Showing posts with label lill st. Show all posts

Monday, March 5, 2012

New Spring Classes for Lillstreet!

Blog Preview! I'm not scheduled to post for Lillstreet until Thursday but because I'm feeling particularly productive this morning, I've already done it! Here's a sneak preview of... the exact blog that will go up Thursday morning. :0)

* * * * *

It's almost Spring! I'm starting to see tiny crocuses poking out of the ground and the Lillstreet Spring Catalog is open for registration! I've got two brand new classes this session that I'd love to tell you a little more about:

Metal on Material (10 Weeks)

Thursday, March 29, 2012 to Thursday, May 31, 2012, 6:30-9:30pm

Level: MultiLevel (Beginner to Advanced)

(Pin by Ashley Gilreath)

Work in both the textiles and metalsmithing departments as you learn how to combine two different materials work while working with both textile and metalsmithing techniques to create wearable or sculptural art for body adornment, jewelry, small sculpture or wall pieces. Fiber techniques including felting, dyeing, embroidery and hand sewing will be covered, and the metalsmithing component will teach you how to saw-pierce, texture, solder and fold form metal. No experience necessary. Materials fee covers materials for first project. Additional metal may be purchased from instructor. $30 materials fee.

Ashley Gilreath and I have been plotting and planning this class for months! We're hoping it will provide an opportunity for students of metals, textiles or neither to experiment and explore the combination of these two realms. We'll look at texture, color, pattern and lots of construction methods. It's gonna be so much fun!

Because the possibilities are endless, I've also started an inspirational pinboard for this class on pinterest. Follow the link to see some really beautiful metal/textile pieces!

Register for Metal on Material here!


Fabric Design and Print Exchange (10 Weeks)

Monday, March 26, 2012 to Monday, May 28, 2012

Level: MultiLevel (Beginner to Advanced)

(Fabric Design by PennyCandy for Spoonflower.)
Perfect for sewers and crafters who want to expand their practices! Are you comfortable with your sewing skills, but want to use fabrics designed AND sewn by you? This course focuses on surface design- specifically, repeat patterns and an exploration in color theory in relation to the finished object. Traditional and digital printing design techniques will be discussed. The final project will be a class-wide fat quarter print exchange. Great for quilters! A class kit will be sold on the first day of class for $20. Students will have access to both sew and print studios during open studio hours. Come to class prepared with project ideas and sample fabrics.

I was thinking specifically of my quilting students when I designed this class, but it will be equally as fun/productive for anyone looking to create their own printed material. There will be plenty of hands-on exercises and lots of oggling lovely fabric!

Register for Fabric Design and Print Exchange here!


I hope to see a lot of new and returning students!! Happy almost spring, everyone!

--Nora

Wednesday, February 8, 2012

New Books on My Shelf

Blog Entry for Lillstreet Textiles!

* * * * *

Merry Christmas to me! Or, maybe by this point it's Happy Valentine's Day to myself...hm. In either case, I have been on a recent book buying binge! Here are some of the new titles I've purchased for my studio:

Super Stitches Knitting, by Karen Hemingway

An amazing collection of different knit patterns! Everything from knits/purls to cables & lace to intricate color work! Looking forward to trying out some of these soon...

Around the World in Knitted Socks, by Stephanie Van Der Linden

This one was actually a Christmas present from an Aunt. 26 beautiful color-worked sock patterns inspired by countries all over the world. SWOON.

The Art of Manipulating Fabric, by Colette Wolff

CLASSIC. I actually can't believe I didn't have this one in my collection already. A veritable go-to for how to make just about any texture with fabric. We have a copy of this one in the Lillstreet Textiles collection! Check it out in the sewing studio!

A Field Guide to Fabric Design, by Kimberly Kight

A new discovery, this book has some amazing resources for fabric design. Pattern and color theory is discussed at length and there are instructions for both traditional and digital methods of design/production. Also, it's really pretty!!

Radical Lace and Subversive Knitting, Catalog by the Museum of Arts & Design

This show was up in NYC when I was in college and features a couple of my professors. The collections of work in this book represent a range of concepts and techniques that were instrumental in my falling head over heals in love with art in general and fiber, as a material and method of communication, specifically.

Aren't books the best???

--Nora

Friday, January 27, 2012

Quilting Boot Camp: Where we left off!

Here's the final entry about Quilting Boot Camp that I did for the lillstreet textiles blog! What an awesome time we had!

* * * * *

We had a great time in our Quilting Boot Camp, held the week between Christmas and New Years! Yes, our goals may have been lofty, but each of my students worked admirably and sped through their projects. Here's where we left off at the end of the week:

Karen finished her eclectic quilt top! Lots of colors and patterns!

She decided to do her basting and quilting at home but spent our final class practicing machine quilting and binding techniques on a pot-holder.

Christine after finishing her queen-size quilt top!

Basting can be a physically exhausting process. Bravo, Christine!

Sometimes you need a little help wielding the expanse of your quilt while you work with it under the machine (provided here by an extra rolling chair.)

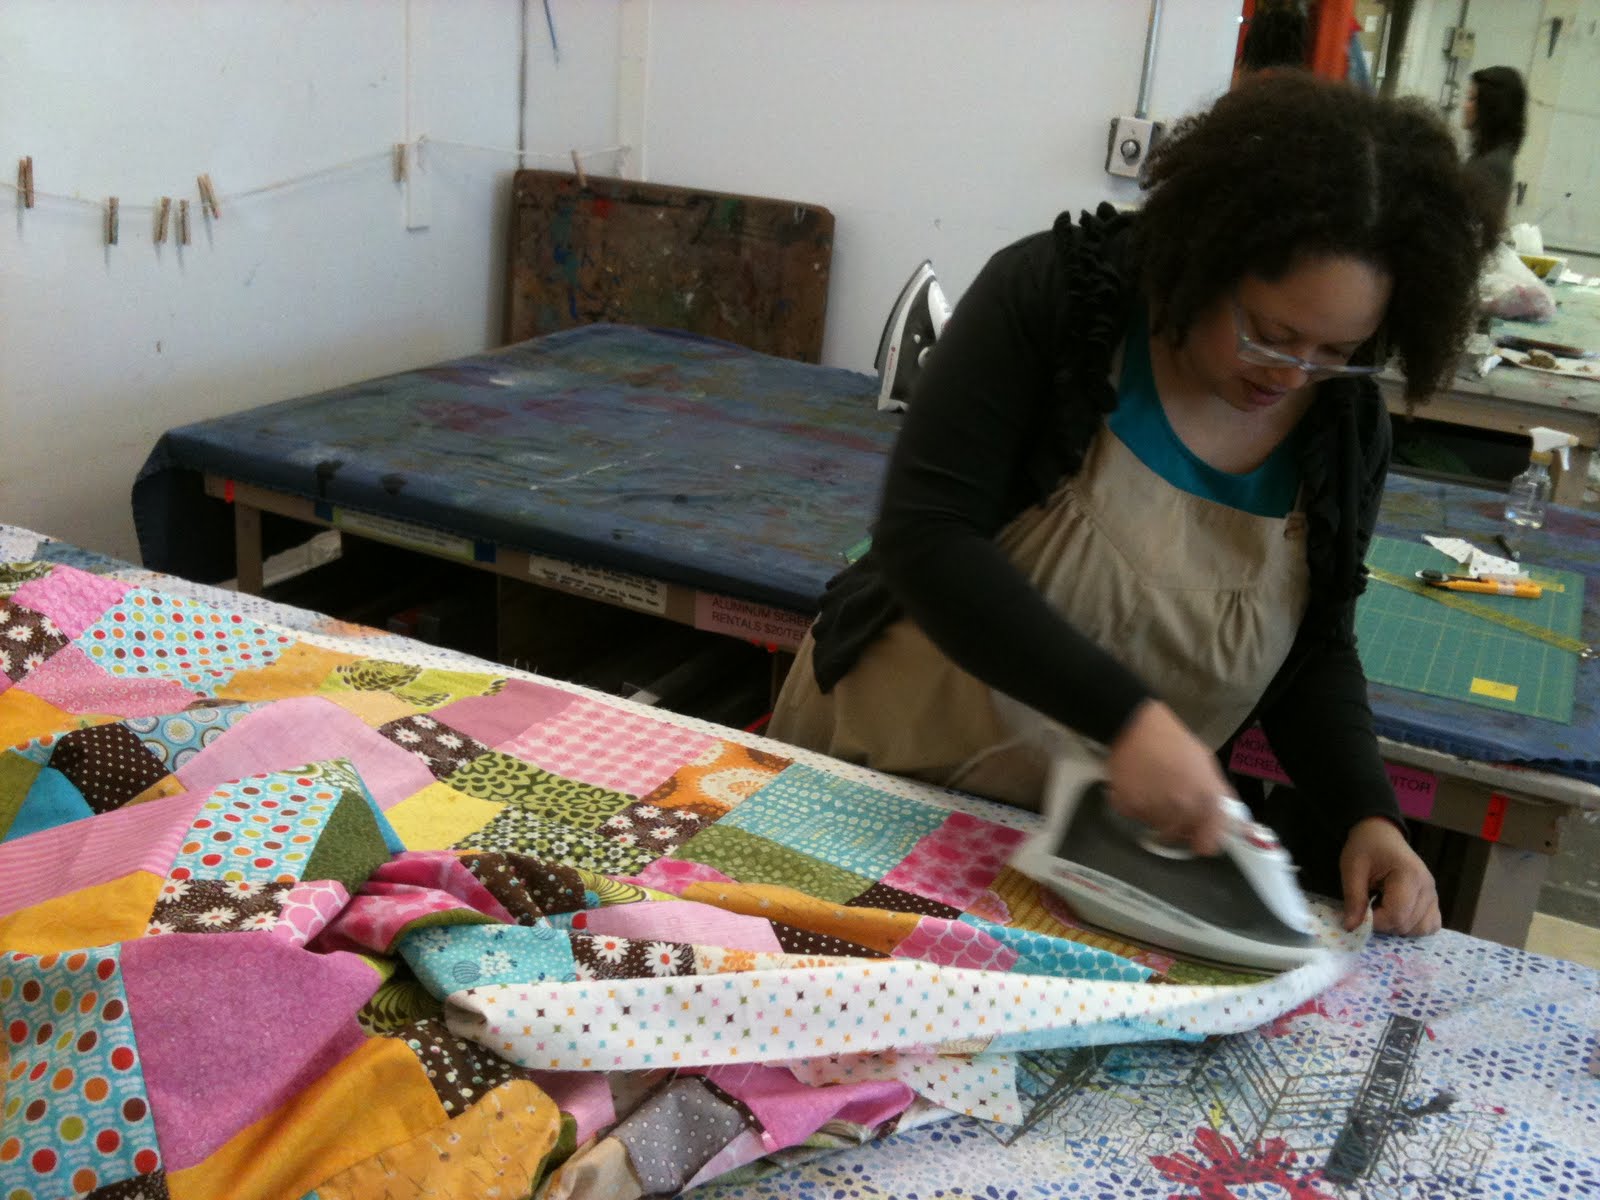
IRONING, YOU GUYS. It's soooo important. Right, Jordana?

Basting! Huzzah!

I was soooo impressed with everyone's creativity and dedication throughout the week. Thanks, you guys! I can't wait to see pics of your finished quilts in their natural habitats!

Anyone else interested in learning how to quilt? I've got another First Time Quilting Class starting in three weeks! Sign up today!

Saturday, December 31, 2011

Quilting Boot Camp: Days 2 & 3

Although I had every intention of blogging our progress every day, boot camp took over our lives! The rest of the week flew by in a blur! I'm going to put it up in two batches, though, so as to not be overwhelming!!

Day Two: Creating the Nine-Patches

The disappearing nine patch pattern starts with, you guessed it, nine patches! We spent the better part of Tuesday sewing our preliminary blocks.


Day Three: Laying out the quilts

Once the nine-patches are finished, they are cut into quarters; these smaller squares become the building blocks for our finished quilts.


It seems like this part would go pretty quickly but, since you're going to be living with this quilt for the forseeable future, all of those little decisions about what color sits next to what takes on a much grander importance.

Each quilter in the class started to create sets of rules for their design; a kind of logic to guide the process depending on their colors and personal styles.


Eeeh! The quilts are coming together!! This is the stage at which I start getting really excited... :0)

Monday, December 26, 2011

Quilting Boot Camp: Day 1

That's right: BOOT CAMP! Five days, three students: come with fabric, leave with a quilt. (Or that's the goal, anyway...) I thought about dressing in camo and combat boots today and wearing a whistle-- "that's a generous quarter inch, not a scant quarter inch: drop and give me 20!"-- but instead I decided to go with a playlist that was 3 hrs of Eye of the Tiger.


HA. Just kidding. I only made them listen to it once. (So far... bwahahaha.)

Day 1: Cutting the fabric

We are making a disappearing nine-patch pattern, for which we need a total of 108 8" squares.

Our three brave recruits... I mean students: Christine, Jordana and Karen.


Less chatting, more cutting! Drop and give me 20!
HA! Gotcha again, it's all cool. :0)


Christine's color palette is phenomenal! All Merimeko prints purchased at the Crate and Barrel outlet. JEALOUS. I can't wait to see how it turns out!


Tomorrow we'll start piecing the squares together!

What are other good montage songs I should download for my montage mix? We're gonna need all the 80's-stye adrenaline pumping we can get come basting day!

Monday, December 5, 2011

Happy Holidays from Lillstreet and other ways to shop!

This past weekend we invited friends, co-workers, students and members of the Lillstreet community to join us for the second annual department Holiday Sale. Much fun was had by all!

Lillstreet Textile's Holiday Sale!

We had ten vendors this year! Some of them were craft fair pros:

Lillstreet Textile's Holiday Sale!
James and Jordana of Qualaar.

Lillstreet Textile's Holiday Sale!
Heather Bella of Spills Her Coffee

And, for the first time, we invited students to apply as well. They did great!

Lillstreet Textile's Holiday Sale!
Caryn

Lillstreet Textile's Holiday Sale!
Amy

(More pictures from the event in my flickr!)

A few months ago I decided not to prioritize making crafts to sell. Instead, I was going to spend my precious little extra studio time to re-vamp my portfolio. Well.. then I had even less studio time than ever so I pretty much ended up doing neither. But the Lillstreet Holiday sale is one of my favorite events of the year! I definitely wasn't going to miss out.

Is it even possible to feel prepared for craft fairs?! If so, I definitely haven't figured out how. I pretty much had to build my whole collection from the ground up in the three weeks leading up to the event. (Y'know, since I had stopped making crafts.)


I even designed some new products!

I've got birch bolsters and birch/brown wood pin cushions! They're pretty adorbz, if I do say so myself.

All in all, I'd say my booth came together quite nicely.

Lillstreet Textile's Holiday Sale!

I'm doing one more fair this season: this SATURDAY! If you're in the Chicago area, come by and check it out!


Happy holiday crafting, everyone! 'Tis the season to buy stuff made by your friends. :0)

Wednesday, November 30, 2011

Last Session's Sew Your Own Hoodie Class!

The fall session's Sew Your Own Hoodie class was a complete success! Check out these amazing sweatshirts made by the students!

Sew Your Own Hoodie
Christine's Cool Hood

Sew Your Own Hoodie
Katie's Asymetric Zipper (still in progress!)

Sew Your Own Hoodie
Erin's Pro-looking Sweatshirt: with Thumb-holes!

Sew Your Own Hoodie
Aliza's Dual Colored Creation

Sew Your Own Hoodie
Lara's sweatshirt will be the most complicated of all! I can't wait to see it when it's done!

For more photos from the hoodie class and other past Lillstreet classes, check out my Lillstreet Flickr folder!

xoxo-- Nora

Wednesday, September 21, 2011

The Inaugural Run of Lill Street's New Bullet Steamer!

*** Yet another blog entry done for the Lill Street Textile Blog! Yay Steamer!***

Just yesterday, the students in Screen Printing with Thickened Dye class got to be the first to witness our brand new Bullet steamer in action! Huzzah!

Printing with dye is a lot more tricksy than printing with ink; instead of sitting directly on top of your fabric, dye needs to be chemically bonded with the fibers. Dye powders are mixed with a thickening agent (sodium alginate) to make it print-able but, once the fabric is washed, the only thing remaining attached is the color. Your fabric ends up as soft as it was before you printed on it!

The shiny, new bullet steamer comes into play after you're done printing but before you wash your fabric. All of those chemicals that make up the sodium alginate tend to cause the colors to bleed when you submerge your fabric in water... but with the steamer, the chemicals are STEAMED out! Here's a little slideshow about how we did it in class:

In order to protect our images, we wrapped our fabric in newsprint.

The fabric is fully encased so that it doesn't end up touching other parts of fabric or the metal steamer insert!

Then we rolled the wrapped fabric around the insert so that the paper won't touch the inside of the steamer silo. (Water condenses inside the steamer- but if our fabric gets wet, the colors will bleed before the chemicals have a chance to evaporate!)

After 35 min in the steamer, we remove our fabric and machine wash it in cold water with some tide and a color-catcher. Throw it in the dryer and done!

We will be doing tests throughout the session to figure out the absolute best condition for the steamer to do it's job.

In order for students to be able to use/take advantage of the new steamer, you will have to take a dye printing class (check out the winter catalog, when it becomes available, for next sessions classes) or the upcoming Steamer Basics Workshop: Saturday, October 1st, 2-5pm. Hope to see you there!

--Nora

www.fiberistanora.com
www.fiberistanora.etsy.com
http://fiberistanora.blogspot.com

Wednesday, June 22, 2011

Tour of Chicago Silk Screen

Yesterday, the employees of Chicago Silk Screen were nice enough to give some Lill St students a tour of their facilities. One of the oldest screen printing business in the city, Chicago Silk Screen is downright fascinating. Did you know that practically everything is silk screened? Plastic buckets, glass bottles, and a lot of those giant vinyl banners! And each of these objects requires it's own special screen.

Alan Shust, CSS production manager and our wonderful tour guide, took us through their process.


This is a room-sized camera englarger used to create the films needed to burn the screen. Before digital printing became popular, this is how all films were created. CSS has two of these devices which can make films 4' x 6' and larger!

Stretching a giant aluminum screen! That little device is a "tense-ometer" so that they know that the screen is stretched properly.

The team at CSS coats their screens a little differently than we do at Lill St: because they are preparing screens that will be used to make thousands and thousands of prints, the screens need extra emulsion. It was fun to talk shop with the pros! Here, Fransisco is coating screens used to print styrofoam coffee cups!

The screens are then burns on this beautiful Vacuum UV light table! (Swoooon...)

And rinsed in the washout station (we should BE so lucky!)

CSS also has a department that takes the used mesh out of old screens restretches them.

Stretching wood screen must be SOO much easier with that pneumatic staple gun!

The basement... where silk screens go to be reborn!

All in all the tour was FASCINATING. Thanks so much for the employees of Chicago Silk Screen for being so hospitable and thanks again to Alan Shust for being such a fantastic tour guide! If you have any printing needs, we highly recommend these guys! (Check out more photos from the tour at my flickr!)