Saturday, December 31, 2011

Quilting Boot Camp: Days 2 & 3

Although I had every intention of blogging our progress every day, boot camp took over our lives! The rest of the week flew by in a blur! I'm going to put it up in two batches, though, so as to not be overwhelming!!

Day Two: Creating the Nine-Patches

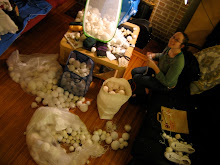
The disappearing nine patch pattern starts with, you guessed it, nine patches! We spent the better part of Tuesday sewing our preliminary blocks.


Day Three: Laying out the quilts

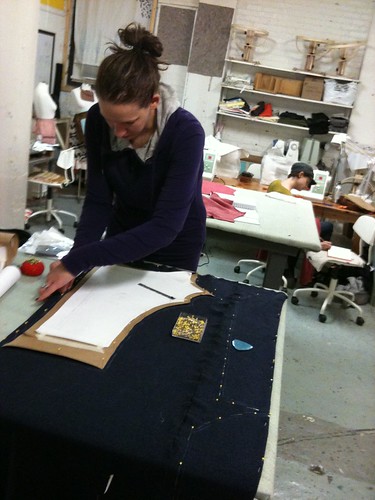
Once the nine-patches are finished, they are cut into quarters; these smaller squares become the building blocks for our finished quilts.


It seems like this part would go pretty quickly but, since you're going to be living with this quilt for the forseeable future, all of those little decisions about what color sits next to what takes on a much grander importance.

Each quilter in the class started to create sets of rules for their design; a kind of logic to guide the process depending on their colors and personal styles.


Eeeh! The quilts are coming together!! This is the stage at which I start getting really excited... :0)

Monday, December 26, 2011

Quilting Boot Camp: Day 1

That's right: BOOT CAMP! Five days, three students: come with fabric, leave with a quilt. (Or that's the goal, anyway...) I thought about dressing in camo and combat boots today and wearing a whistle-- "that's a generous quarter inch, not a scant quarter inch: drop and give me 20!"-- but instead I decided to go with a playlist that was 3 hrs of Eye of the Tiger.


HA. Just kidding. I only made them listen to it once. (So far... bwahahaha.)

Day 1: Cutting the fabric

We are making a disappearing nine-patch pattern, for which we need a total of 108 8" squares.

Our three brave recruits... I mean students: Christine, Jordana and Karen.


Less chatting, more cutting! Drop and give me 20!
HA! Gotcha again, it's all cool. :0)


Christine's color palette is phenomenal! All Merimeko prints purchased at the Crate and Barrel outlet. JEALOUS. I can't wait to see how it turns out!


Tomorrow we'll start piecing the squares together!

What are other good montage songs I should download for my montage mix? We're gonna need all the 80's-stye adrenaline pumping we can get come basting day!

Monday, December 5, 2011

Happy Holidays from Lillstreet and other ways to shop!

This past weekend we invited friends, co-workers, students and members of the Lillstreet community to join us for the second annual department Holiday Sale. Much fun was had by all!

Lillstreet Textile's Holiday Sale!

We had ten vendors this year! Some of them were craft fair pros:

Lillstreet Textile's Holiday Sale!
James and Jordana of Qualaar.

Lillstreet Textile's Holiday Sale!
Heather Bella of Spills Her Coffee

And, for the first time, we invited students to apply as well. They did great!

Lillstreet Textile's Holiday Sale!
Caryn

Lillstreet Textile's Holiday Sale!
Amy

(More pictures from the event in my flickr!)

A few months ago I decided not to prioritize making crafts to sell. Instead, I was going to spend my precious little extra studio time to re-vamp my portfolio. Well.. then I had even less studio time than ever so I pretty much ended up doing neither. But the Lillstreet Holiday sale is one of my favorite events of the year! I definitely wasn't going to miss out.

Is it even possible to feel prepared for craft fairs?! If so, I definitely haven't figured out how. I pretty much had to build my whole collection from the ground up in the three weeks leading up to the event. (Y'know, since I had stopped making crafts.)


I even designed some new products!

I've got birch bolsters and birch/brown wood pin cushions! They're pretty adorbz, if I do say so myself.

All in all, I'd say my booth came together quite nicely.

Lillstreet Textile's Holiday Sale!

I'm doing one more fair this season: this SATURDAY! If you're in the Chicago area, come by and check it out!


Happy holiday crafting, everyone! 'Tis the season to buy stuff made by your friends. :0)

Wednesday, November 30, 2011

Last Session's Sew Your Own Hoodie Class!

The fall session's Sew Your Own Hoodie class was a complete success! Check out these amazing sweatshirts made by the students!

Sew Your Own Hoodie
Christine's Cool Hood

Sew Your Own Hoodie
Katie's Asymetric Zipper (still in progress!)

Sew Your Own Hoodie
Erin's Pro-looking Sweatshirt: with Thumb-holes!

Sew Your Own Hoodie
Aliza's Dual Colored Creation

Sew Your Own Hoodie
Lara's sweatshirt will be the most complicated of all! I can't wait to see it when it's done!

For more photos from the hoodie class and other past Lillstreet classes, check out my Lillstreet Flickr folder!

xoxo-- Nora

Monday, October 31, 2011

Happy Halloween!

Apparently, one year when I was pretty young I told my mother that Halloween was my "High Holy Day." I'm not even sure if I knew then what a high holy day was but celebrating it to the max has definitely resolved itself into a personal tradition. Now that I work in a costume shop, I knew that this year I had to pull out all the stops.

For the first time maybe ever I decided to go with something scary:


Remember this? It's a literal mash-up where author Seth Grahame- Smith inserts a spooky zombie tale right into the original text of Pride and Prejudice. HI-larious! Here's how my costume came together:


1.) Bought a pattern for a Regency period dress. Ripley helped.


2.) Made the dress.
3.) And then...... I pretty much destroyed it.

Before:
After:
I got to learn a little about distressing costumes during our recent production of Sweeney Todd: it's really fun! For Sweeney I got to get into the heads of the characters... think about how they lived and how their clothing would wear and show age. In this case, my "characters" only real motivation was "braaaaaaiiiiiins..." so I got to do whatever I wanted. (That's brown and red rit dye, lots of tearing, some sand paper and some brown acrylic paint.)

Then for the make up:


I know pretty much NOTHING about zombie make up so my friend, Maggie, agreed to help me out: she'd taken a stage make-up class in grad school and was excited to get out her kit again!

The key ingredients for awesome zombie make up? Liquid latex (for the peeling effect) and fake blood. This stuff was edible and tasted minty! Fortunately for anyone I hugged hello during the course of the evening, it also washed out with water.

All that was left was for me to find some brains... and maybe a wealthy husband.

Picture 122

(Check out the rest of my halloween photos at my flickr! And lots and lots of halloween photobooth photos, too!)

Sunday, October 30, 2011

Theater Magic

So I learned a little something about theater politics while working on The Sound of Music (our most recent production at Drury Lane.) Because the show was so huge, the costume shop rented a package of costumes: hypothetically, there should have been a couple of each costume for each of the principal characters so that we could fit the closest to our actors. Unfortunately, the package we rented was in a pretty horrible state of disrepair. In addition to the crappy previous stitching blunders, in turned out that we were short a couple of key items. Here was the issue: props are props even if they are fabric... even if it's fabric that has to match the costumes. Anyone seen The Sound of Music? Remember the curtain clothes? Of course you do. It's a story staple. BUT: curtains= props and curtain clothes= costumes. WOOPS. We ended up spending a LOT of time and money to buy the fabric and make the clothes ourselves. (Also? There is NO WAY Maria could have sewn those outfits overnight. SRSLY.)

There are a LOT of children in that family. Especially since they're double cast for our production. DIRNDLES, you guys. Weeep.

Also in that scene is a reference to fabric that is given to Maria for her to make her own dress. Guess what? The dress, we had. But the bolt of fabric? Not included in the package. Enter: Nora, textiles superhero.

RIGHT??! One of those things I'm kinda proud of. :0) Just a little bit of theater magic.

Saturday, October 1, 2011

Sew Your Own Hoodie Class in Action!

** Yeah... I spend most of my time at Lill St. Here's another blog entry for them!**

We're already a couple weeks into the fall semester and my Sew Your Own Hoodie class has dived headfirst into their projects! Here are some photos of the students making paper patterns from their favorite hooded sweatshirts! After the paper patterns are done, we'll use them to make design/size alterations so that each seamstresses hoodie will be a one of a kind masterpiece!

Wednesday, September 21, 2011

The Inaugural Run of Lill Street's New Bullet Steamer!

*** Yet another blog entry done for the Lill Street Textile Blog! Yay Steamer!***

Just yesterday, the students in Screen Printing with Thickened Dye class got to be the first to witness our brand new Bullet steamer in action! Huzzah!

Printing with dye is a lot more tricksy than printing with ink; instead of sitting directly on top of your fabric, dye needs to be chemically bonded with the fibers. Dye powders are mixed with a thickening agent (sodium alginate) to make it print-able but, once the fabric is washed, the only thing remaining attached is the color. Your fabric ends up as soft as it was before you printed on it!

The shiny, new bullet steamer comes into play after you're done printing but before you wash your fabric. All of those chemicals that make up the sodium alginate tend to cause the colors to bleed when you submerge your fabric in water... but with the steamer, the chemicals are STEAMED out! Here's a little slideshow about how we did it in class:

In order to protect our images, we wrapped our fabric in newsprint.

The fabric is fully encased so that it doesn't end up touching other parts of fabric or the metal steamer insert!

Then we rolled the wrapped fabric around the insert so that the paper won't touch the inside of the steamer silo. (Water condenses inside the steamer- but if our fabric gets wet, the colors will bleed before the chemicals have a chance to evaporate!)

After 35 min in the steamer, we remove our fabric and machine wash it in cold water with some tide and a color-catcher. Throw it in the dryer and done!

We will be doing tests throughout the session to figure out the absolute best condition for the steamer to do it's job.

In order for students to be able to use/take advantage of the new steamer, you will have to take a dye printing class (check out the winter catalog, when it becomes available, for next sessions classes) or the upcoming Steamer Basics Workshop: Saturday, October 1st, 2-5pm. Hope to see you there!

--Nora

www.fiberistanora.com
www.fiberistanora.etsy.com
http://fiberistanora.blogspot.com